
Unlock Unlimited Entertainment with Sapphire IPTV
28,000+ Channels & 150,000 VODs from Around the World at Your Fingertips
Free trials may be delivered within 48 hours due to backlogs, but subscriptions are activated within 15 minutes of purchase.
Stream Over 28,000 Channels and 150,000 Movies & Series with Sapphire IPTV
Step into the ultimate entertainment experience with Sapphire IPTV, offering access to over 28,000 live channels and 150,000 on-demand movies and series from around the world. Whether you’re a fan of global news, blockbuster hits, trending shows, or live sports, Sapphire IPTV delivers it all in high-quality streaming. Enjoy unlimited access to top-rated content from the comfort of your home and on any device.


Key Features
As a trusted name in IPTV, Sapphire IPTV offers top-tier live TV and VOD services. Built for viewers in the USA, Canada, and beyond, we focus on performance, security, and quality.
Global Channel Access
"Access over 28,000 channels worldwide, keeping you connected to international news, sports, and entertainment from your favorite countries."
High-Quality Streaming
"Enjoy HD and 4K content with minimal buffering, delivering a sharp, clear viewing experience no matter what you’re watching."
Extensive VOD Library
"With 150,000 movies and shows, our Video On Demand library ensures there’s always something fresh and exciting to watch."
Multi-Device Compatibility
"Stream on Smart TVs, mobile devices, and more, allowing you to enjoy your favorite content across various screens at home or on the go."
Flexible IPTV Plans
We offer plans that suit everyone’s needs and budget.
1 Month
$15
- Anti Buffering
- 28K+ Live Channels
- Weekly Vod Update
- 4k, UHD, FHD, HD.
- Stable Servers
- 24/7 Live Chat Support
3 Months
$30
- Anti Buffering
- 28K+ Live Channels
- Weekly Vod Update
- 4k, UHD, FHD, HD.
- Stable Servers
- 24/7 Live Chat Support
1 Year
$60
- Anti Buffering
- 28K+ Live Channels
- Weekly Vod Update
- 4k, UHD, FHD, HD.
- Stable Servers
- 24/7 Live Chat Support
6 Months
$40
- Anti Buffering
- 28K+ Live Channels
- Weekly Vod Update
- 4k, UHD, FHD, HD.
- Stable Servers
- 24/7 Live Chat Support
1 Month
$25
- Anti Buffering
- 28K+ Live Channels
- Weekly Vod Update
- 4k, UHD, FHD, HD.
- Stable Servers
- 24/7 Live Chat Support
3 Months
$50
- Anti Buffering
- 28K+ Live Channels
- Weekly Vod Update
- 4k, UHD, FHD, HD.
- Stable Servers
- 24/7 Live Chat Support
1 Year
$116
- Anti Buffering
- 28K+ Live Channels
- Weekly Vod Update
- 4k, UHD, FHD, HD.
- Stable Servers
- 24/7 Live Chat Support
6 Months
$74
- Anti Buffering
- 28K+ Live Channels
- Weekly Vod Update
- 4k, UHD, FHD, HD.
- Stable Servers
- 24/7 Live Chat Support
1 Month
$30
- Anti Buffering
- 18K+ Live Channels
- Weekly Vod Update
- 4k, UHD, FHD, HD.
- Stable Servers
- 24/7 Live Chat Support
3 Months
$70
- Anti Buffering
- 18K+ Live Channels
- Weekly Vod Update
- 4k, UHD, FHD, HD.
- Stable Servers
- 24/7 Live Chat Support
1 Year
$171
- Anti Buffering
- 18K+ Live Channels
- Weekly Vod Update
- 4k, UHD, FHD, HD.
- Stable Servers
- 24/7 Live Chat Support
6 Months
$118
- Anti Buffering
- 18K+ Live Channels
- Weekly Vod Update
- 4k, UHD, FHD, HD.
- Stable Servers
- 24/7 Live Chat Support
1 Month
$40
- Anti Buffering
- 18K+ Live Channels
- Weekly Vod Update
- 4k, UHD, FHD, HD.
- Stable Servers
- 24/7 Live Chat Support
3 Months
$90
- Anti Buffering
- 18K+ Live Channels
- Weekly Vod Update
- 4k, UHD, FHD, HD.
- Stable Servers
- 24/7 Live Chat Support
1 Year
$215
- Anti Buffering
- 18K+ Live Channels
- Weekly Vod Update
- 4k, UHD, FHD, HD.
- Stable Servers
- 24/7 Live Chat Support
6 Months
$158
- Anti Buffering
- 18K+ Live Channels
- Weekly Vod Update
- 4k, UHD, FHD, HD.
- Stable Servers
- 24/7 Live Chat Support
3 Simple Steps to Start Streaming with Sapphire IPTV
- Pick Your Plan & Receive Your Invoice
Choose the subscription plan that fits your viewing needs. Once selected, we’ll send you an invoice with easy payment instructions through PayPal. - Activate Your Account
Upon payment, our team will activate your account manually. Look out for an email with your Xtream codes and M3U link to get started. - Start Streaming Instantly
Enter your Xtream codes into your IPTV player, and dive into unlimited entertainment with Sapphire IPTV!
With just three easy steps, you’re ready to enjoy a world of channels, movies, and shows.
Why Choose Sapphire IPTV
Unbeatable Value for Global Entertainment
Access a vast selection of live channels and on-demand content worldwide. From movies to sports, enjoy premium programming from all corners of the globe at a fraction of cable costs.
Comprehensive Support, Day and Night
Our 24/7 customer service team is here to help with setup, troubleshooting, and any questions. Enjoy reliable assistance anytime via live chat or email.
Easy Setup on Any Device
Get started quickly on your favorite device. Sapphire IPTV works with Smart TVs, smartphones, tablets, and more, for premium content anytime, anywhere.
Free Trial – Start Streaming Today!
Try our service for free! Before committing, you can experience 22,000+ channels, 4K streaming, and our extensive VOD library. No payment is needed.
Featured Content
Our support team is available day and night for setup, troubleshooting, and inquiries. You can contact us anytime via live chat, email, or phone.


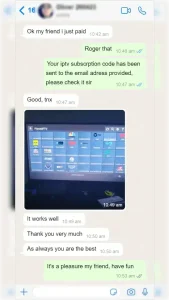
Testimonials


Frequently Asked Questions
What is Sapphire IPTV?
“Sapphire IPTV is a premier streaming service offering access to over 28,000 live TV channels and 150,000 VODs worldwide.”
1. How fast is activation?
Activation is instant! As soon as you subscribe, our team will manually create your line and ship between 15 min to 4 hours.
Does IPTV still exist?
Yes, IPTV is widely available and popular. It has grown in popularity as more people seek flexible streaming options beyond traditional cable and satellite TV.
Is it safe to buy IPTV?
It’s safe to buy IPTV from reputable providers. Reliable services use secure payment methods and authorized content. Be cautious with lesser-known providers, as they may not offer legitimate or secure streams.
Does IPTV get Netflix?
IPTV services typically offer live TV channels and Video on Demand but do not include subscription-based services like Netflix. You’ll need a separate Netflix account for their exclusive content.
What can be watched on IPTV?
IPTV typically offers live TV channels, sports, movies, series, and specialty channels from around the world. The content available depends on the provider and subscription package.